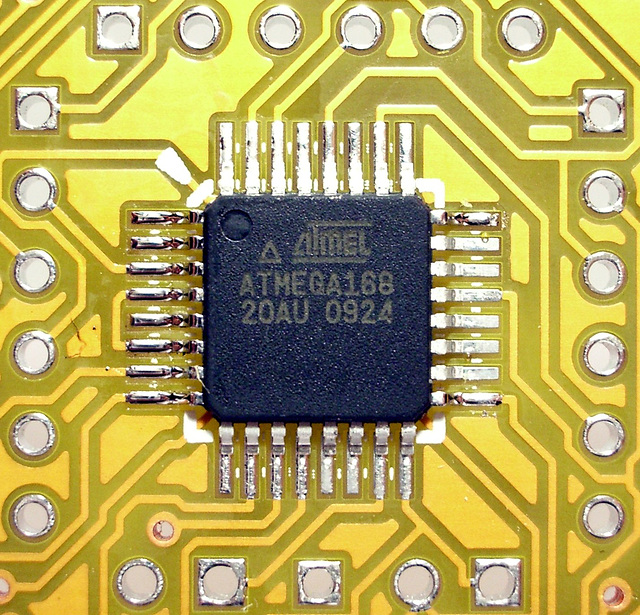
V2.0 alpha - assembly step #8
V2.0 alpha - assembly step #9
V2.0 alpha - assembly step #7
All sides done
V2.0 beta - assembly step #0.2
V2.0 beta - assembly step #1
V2.0 beta - assembly step #3
Close up of the pins
myMultiProg + mySmartUSB MK2
myMultiProg
Development board + programmer + LCD addon
myAVR Board MK2 USB
LCD board
myAVR educational KIT
myAVR educational KIT
myAVR educational KIT
mySmartUSB MK2 on openSUSE 11
mySmartUSB MK2 on openSUSE 11
mySmartUSB MK2 on openSUSE 11
mySmartUSB MK2 on openSUSE 11
WS2812B test board
WS2812B + ATmega168/328 breakout
So tiny!
Pogo-Key parts
Pogo-pin tacked down
Pogo-Key
Pogo-Key
Pogo-pin contact alignment
Pogo-pins closeup
Pogo-Key
Pogo-Key in action
Tiny stuff
Propped up
Added a new button
Pogo-key
IKEA Samtid reading light
IKEA Samtid reading light
IKEA Samtid reading light
IKEA Samtid reading light
IKEA Samtid reading light
Heat-shrink tube wrapped board
ATmega168 QFN32 - tiny
14mm button - 0402 parts
18mm button - 0805/0603 parts
V2.0 alpha - assembly step #6
V2.0 alpha - assembly step #5
Tacking down the ATmega168
V2.0 alpha - assembly step #4
V2.0 alpha - assembly step #2
ATmega168
V2.0 beta - assembly step #7
V2.0 beta - assembly step #8
V2.0 beta - assembly step #6
V2.0 beta - assembly step #5
Finished front side - The Spider is waiting
V2.0 beta - assembly step #4
V2.0 beta - assembly step #2
V2.0 beta - assembly step #0.1
Definitely green
Green / yellow ?
Purple
Pink ?
White on full blast
Some GIMP magic applied
Old vs. new
V2.0 alpha - assembly step #14
V2.0 alpha - assembly step #13
V2.0 alpha - assembly step #12
V2.0 alpha - assembly step #11
V2.0 alpha - assembly step #10
V2.0 alpha - assembly step #3
V2.0 alpha - assembly step #1
V2.0 alpha - assembly step #0.2
V2.0 alpha - assembly step #0.1
Artsy mistake
8x8 RGB Matrix -1st prototype #06
8x8 RGB Matrix -1st prototype #05
8x8 RGB Matrix -1st prototype #04
8x8 RGB Matrix -1st prototype #03
8x8 RGB Matrix -1st prototype #02
8x8 RGB Matrix -1st prototype #01
IKEA - quick mood-lamp mod
imgp1570
imgp1573
imgp1576
imgp1572
imgp1567
imgp1569
Protoboard + lots and lots of wire
imgp1579
imgp1580
Debugging an ATmega168
Debugging an ATmega168
1st arduino project - HAL 9000
1st arduino project - M² scanner pimped
1st arduin project - boxed
1st arduino project
boarduino front side
boarduino back side
The Game Cube
The Game Cube
The Game Cube
The Game Cube
The Game Cube
The Game Cube
The Game Cube
Keywords
Authorizations, license
-
Visible by: Everyone -
All rights reserved
-
104 visits
Left side done


Nice and shiny. As you can see, I don't use RoHS compliant solder. Tried it and instantly hated it. I didn't want to spend a lot of money for a new soldering station, besides I couldn't get the one I wanted (Hakko).
- Keyboard shortcuts:
Jump to top
RSS feed- Latest comments - Subscribe to the comment feeds of this photo
- ipernity © 2007-2024
- Help & Contact
|
Club news
|
About ipernity
|
History |
ipernity Club & Prices |
Guide of good conduct
Donate | Group guidelines | Privacy policy | Terms of use | Statutes | In memoria -
Facebook
Twitter

Sign-in to write a comment.