Shuttle Ignition Modification
Folder: Technical, Ham Radio, Photography Etc from 2006
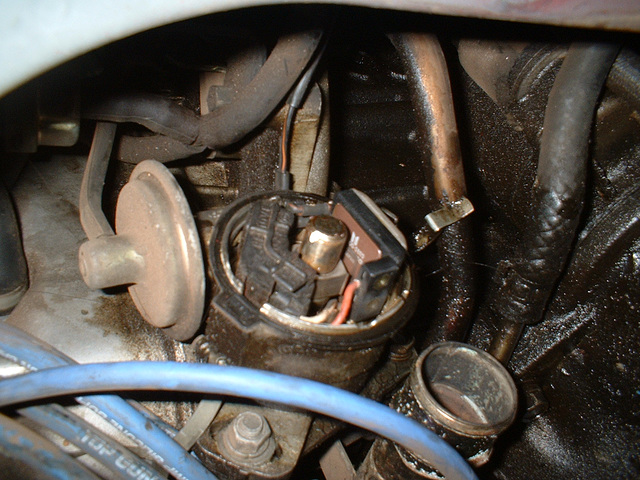
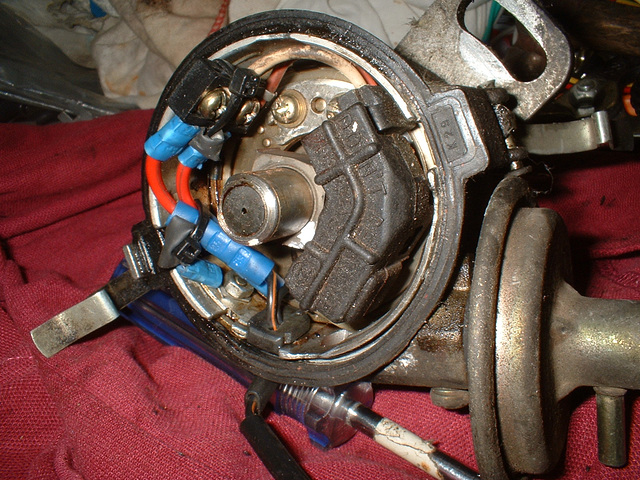
These photos show how I replaced the original 'ignitor' module, after it failed, with a Champion CM418 module. The module selection came from a highly skilled automotive engineer.
07 Nov 2007
shuttle dizzy 002
A view of the distributor prior to removal with the cap and ignitor cover removed. The cooling hose has also been removed.
13 Nov 2007
Shuttle ignition 005
Shows the new wiring in the dizzy. The original lugs are retained on the pick-up wires. The original insulating clamp is used to connect to two std spade crimp lugs which have been drilled and filed to suit. The lugs are connected to short lengths of 4sq mm multi strand wire. The solder lugs are retained on the wires to the coil. These have been squashed into a suitable shape for use with the crimp joiner. Two eye lugs have had a small loop of single strand wire, with sleeving, crimped. These are fixed inside the dizzy using screws and nuts in the ignitor mounting holes. These provide blockage of the holes and cabletie anchor points to enable securing of the wiring.
Jump to top
RSS feed- Latest items - Subscribe to the latest items added to this album
- ipernity © 2007-2024
- Help & Contact
|
Club news
|
About ipernity
|
History |
ipernity Club & Prices |
Guide of good conduct
Donate | Group guidelines | Privacy policy | Terms of use | Statutes | In memoria -
Facebook
Twitter


